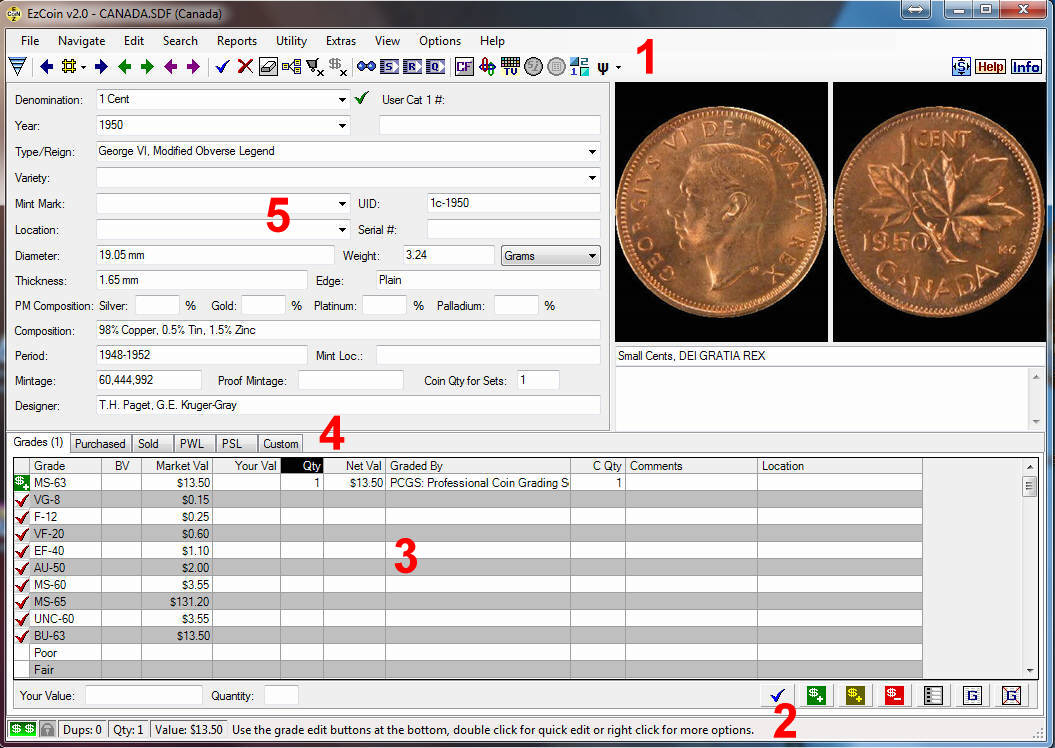
Anatomy of the EzCoin Main Data Entry Screen
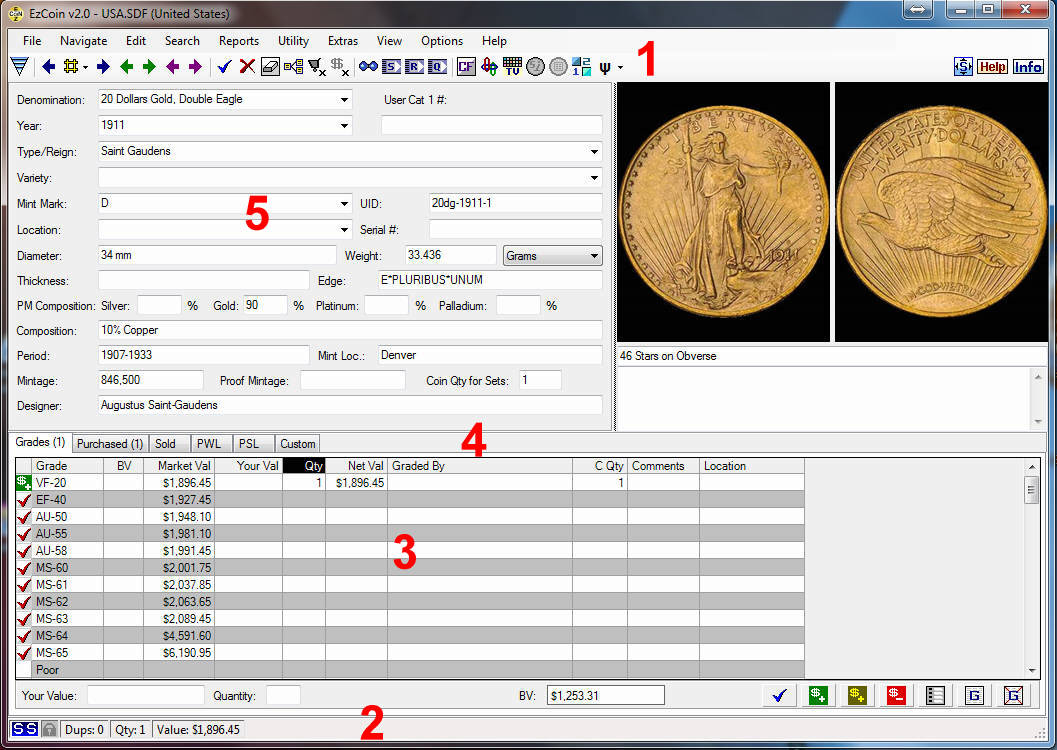
1) Tool Bar: This is where most of the navigation and other controls are located. Blue arrows navigate through the SUPPLIED databases, Green arrows navigate through your inventoried items.
2) Status Bar: This is where helpful hints appear when you hover over any icon. Bottom Right corner of Status Bar will always have an icon to indicate the status of the current record ( inventoried, supplied, custom etc … )
3) Grades Area: This is where the bulk of the data entry occurs. Just select the appropriate rows & click on the GREEN $+ to enter or the RED $- to remove a grade entry.
RIGHT clicking on any icon or label on the main screen will pop up specific help for that item.
4) Tabbed Spreadsheet Data Grids: This is where Purchase & Sold details are entered. PWL & PSL ( Priority Want & Sell list details are shown here and any Custom fields you create will be shown in the Custom Tab. Click any tab to show the grid view for the respective information type. The fields which appear in the grid view for the Grades tab can be reordered or removed from the grid altogether using the Field Settings for Grade Data menu option.
5) Coin Details: This area of the main application window contains the basic coin details information. The image preview area and the coin details/comments panes share the same horizontal band of the main window. You can drag the vertical separator between these two areas to reallocate space between them. Every coin record is identified by 5 key attributes: Denomination, Year, Type/Reign, Variety, & Mint Mark
RIGHT clicking on any icon or label on the main screen will pop up specific help for that item.